Table of Contents
-Downloading and Installing IRC
-Getting on IRC
-Downloading on IRC
-Advanced Downloading
Downloading and Installing IRC
First, you need to download mIRC, an IRC client (a program that allows you to get on IRC). We'll go with a modified version of mIRC, the SysReset version. You can download SysReset 2.53 with mIRC 6.12 here. SAVE THE FILE TO YOUR COMPUTER. If you want to learn more about SysReset or mIRC, you can visit their sites here and here.
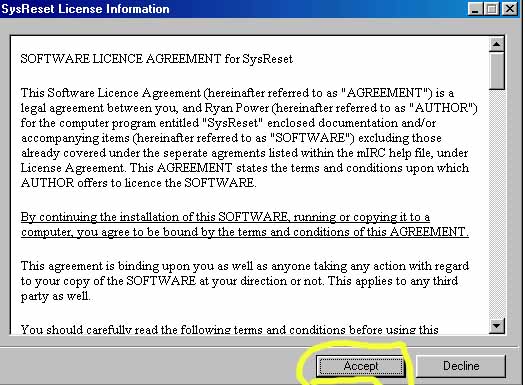
Once the file finishes downloading, which shouldn't take too long even on a 56k connection, click open. A box will pop up titled "SysReset License Information". Click on the accept button.
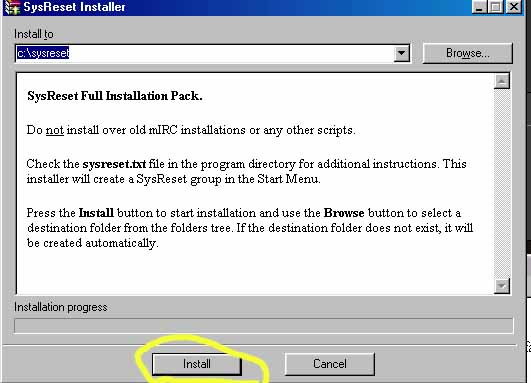
Another box will pop up, titled "SysReset Installer". The default install location is C:\SysReset. Change it if you want to. Then, click Install. The program will install.
Getting on IRC
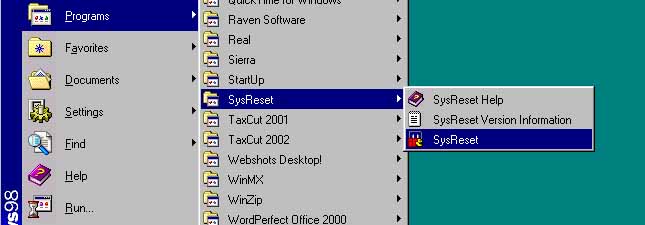
Now, open the Start Menu and go to Programs. SysReset should now be on it. Open it.
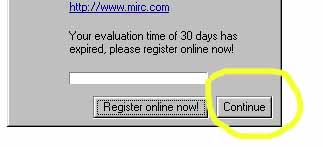
The program will load, and an "About mIRC" box will pop up, asking you to register it. You don't want to do this; it will cost money. Click "Continue". It will ask you to do this every time you start it up. Also, even when the evaluation period runs out, you CAN still use SysReset. You do not need to re-install it.
After you click continue, another box will pop up, asking for your Full Name, Email, Nickname, and Alternative. Enter your real full name if you want - but remember that anyone can see what it is. Enter a valid email (you will not be spammed). In the "Nickname" Box, enter a name that you want to be known as in IRC. In case someone is already using that nickname, enter a different one under "alternative". Then click OK.
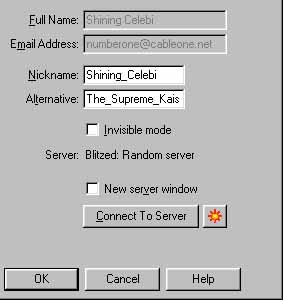
-FYI, a nickname cannot contain spaces or some special characters.
Now, only the main mirc window is left. Type /server irc.blitzed.org and press enter.

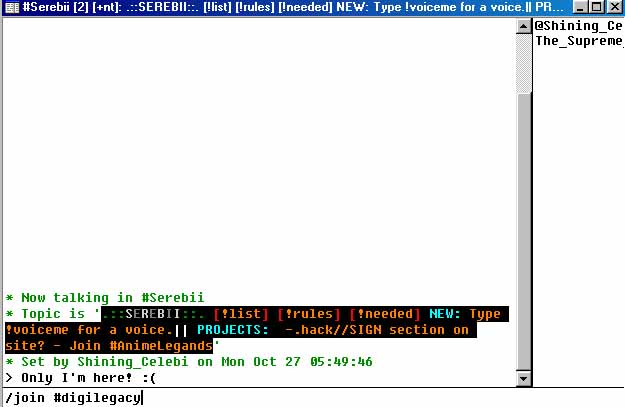
Text will appear, indicating you are connected to the server. Then type /join #Serebii and press enter. From there, Shining Celebi or anyone else there will help you.
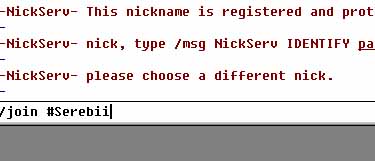
If no-one is there, type /join #digilegacy.
Downloading on IRC
Before doing anything, you need to be sure that your version of mIRC is properly configured to download files, and won't just reject them. The menu at the top contains File View Favorites Tools SysReset Window Help. Click on "Tools" and go to "Options". Click on DCC. Under "On Send Request", click "Show Get Dialog". This means, that instead of accepting a file or ignoring it, it will ask you if you're sure you want that file. "Ignore All" means that you won't be able to recieve any files, and "Auto-Get File" means that anytime someone sends you something, it will download automatically. This is not recommended, because a malicious person could send you viruses or other files you do not want without your knowledge.
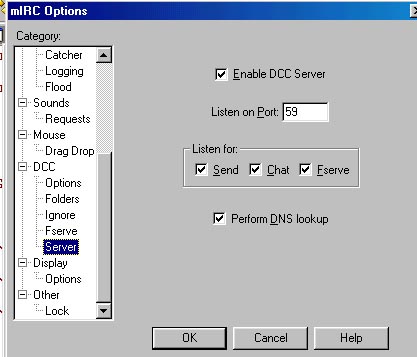
Under "DCC" is a subcategory called "Server". Click on it. Make sure it looks exactly like this screenshot does:
Now, once you're done with that, go to "Ignore" under "DCC". Click on the drop-down box, and select Disabled. Make sure "Turn Ignore Back On In..." is NOT checked. This will make sure that mIRC still doesn't try to block you from getting files. Click OK, which closes out the Options window. Thankfully, now you're done configuring options and can get to download - but if you have a firewall or similiar software, you may want to turn it off temporarily since it also will prevent you from accessing some file servers and getting files.
Now, you need to find out who has FServes, and what to type to "trigger" them. Type !list in the channel window (i.e., #Serebii or #digilegacy window.) This tells all the file servers that you need a list of them, and they will send you "FServe Ads" looking something like this:
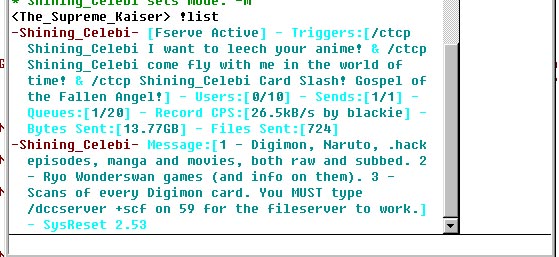
Each FServe ad is composed of three to four parts: [FServe Active] tells us that it's a regular FServe, and not a TDCC or XDCC FServe (more on these later), the Triggers tell us what to type to access the different file available on this server, the third tells us information on this FServe (for example, how many files it's send, and how fast the fastest download was). The fourth is usually a description of the files on the FServer. In this case, it tells us that the first trigger contains Digimon, Naruto, and .hack episodes, in raw Japanese and in Japanese but with English subs; that the second trigger contains thr Ryo Wonderswan games and information on them, and that the third contains Digimon card scans.
But before we get into how to connect to the FServe and browse through it's files, there's one thing you should do that will make it a lot easier. Go to the "SysReset" menu, click on "Addon Manager", click on "fserve_browser.ini", and click "Load", and then" Done". Now that that's over with, remember the text like this in the Fserve?
Triggers:[/ctcp Shining_Celebi I want to leech your anime! & /ctcp Shining_Celebi come fly with me in the world of time! & /ctcp Shining_Celebi Card Slash! Gospel of the Fallen Angel!]
Each one of these is a trigger, and will open the server. /ctcp Shining_Celebi I want to leech your anime! for example, is a trigger, and typing it in the channel window and pressing enter will open the FServe window, which is fairly easy - double-click on folders you want to open and files you want to download.
Once you finish downloading a file, you can find it in the default download directory unless you saved it elsewhere. This is C:\sysreset\downloads. If you are unsure as to how to find that folder, you can use the Windows Find function, look in My Computer or Windows Explorer, or open Internet Explorer and type C:\sysreset\downloads.
Advanced Downloading
You don't need to read this section unless you still have problems downloading files on IRC. This section addresses:
- TDCC Downloading
- XDCC Downloading
- Firewalls
- Routers
TDCC Downloading
TDCCs are a type of fileserver that contain only one file. These are TDCCs:
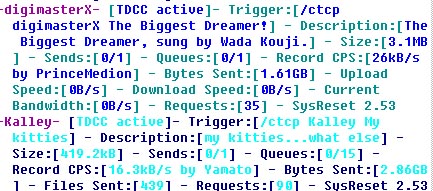
Typing the trigger of a TDCC will send you the file automatically. For example, typing /ctcp digimasterX The Biggest Dreamer would send you an MP3 of a song called The Biggest Dreamer, while typing /ctcp Kalley My kitties would send you a picture of Kalley's demons kitties. TDCCs normally only contain special small files or newly released files.
XDCC Downloading
XDCCs are similiar to regular fileservers, except that normally only very fast people have them, and they operate solely within notices, instead of opening a new window. Because the exact commands of XDCCs frequently vary, I won't go into further detail, but the XDCC should provide a list of commands that you can use on it.
Firewalls
If you have a firewall and encounter trouble downloading, try opening ports 1024 through 4096, and port 59. These are the ports that DCC, the system that computers on IRC use to communicate with each other, uses. If you are unable to do this, you may need to turn your firewall off. If you have Windows XP, go to the Control Panel, click on Network Connections, click on your connection, choose "Change Settings of this Connection", go to the Advanced Tab and make sure that the firewall is turned off.
Routers
Routers are hardware that connections multiple computers together so they can share files and in some cases Internet connections. Most routers have built-in firewalls. If you believe your router has a firewall, try opening Internet Explorer and entering the following into the address bar:
192.168.1.1
OR
192.168.0.1
If these IP addresses do not work, you should reference the router's manual or do a netstat in the Command Prompt in Windows XP, or MS-DOS in earlier versions of Windows. If you have the correct IP, it will ask you for a username and password. In general, you should leave the username blank, and enter admin in the password field. From there, look for DMZ and enter your computers LAN IP address (on Linksys routers, 192.168.1.100+ by default, try doing a local DNS or netstat). If there is no DMZ, look for Port Fowarding or Port Range Fowarding and enter the ports listed above.